
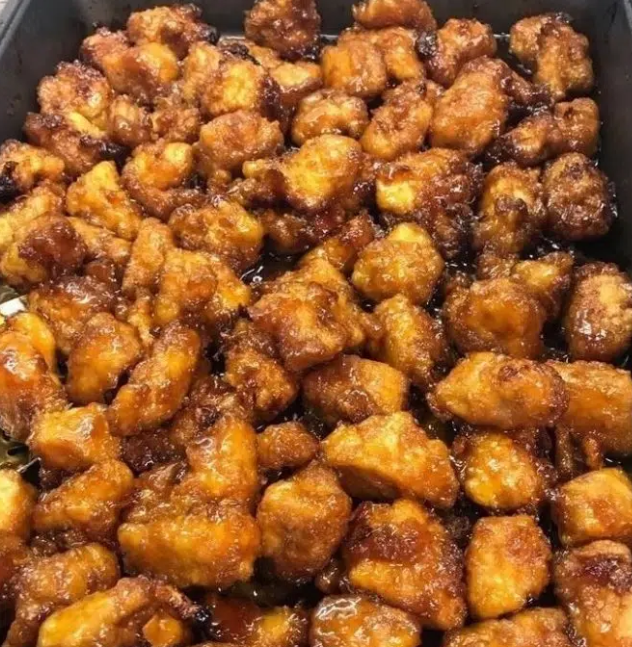
Why You’ll Love This Recipe
- Simple sauce ingredients: Pantry staples create a flavorful glaze.
- Tender chicken pieces: Evenly cut chicken cooks consistently.
- A coating that holds sauce: Cornstarch and egg give the glaze something to cling to.
- Easy serving: Pair with rice and a vegetable side.
- Useful leftovers: Reheat portions for another meal.
Ingredients You’ll Need
Chicken Breasts
Use four boneless, skinless chicken breasts, cut into approximately 1-inch pieces.
Chicken breasts vary considerably in size. About 1½–2 pounds total works well with the coating and sauce quantities here. If your four breasts are much larger, use a larger batch of sauce or reserve some chicken for another recipe.
Cornstarch
Use 1 cup cornstarch for coating.
Shake off excess before dipping the chicken into the eggs. You may not use every bit of the measured cornstarch.
Eggs
Two large beaten eggs help form the outer coating.
Dip the cornstarch-coated pieces into the eggs just before adding them to the skillet.
Vegetable Oil
Use ¼ cup vegetable oil, divided between batches as needed.
A neutral oil works well for browning without adding a strong flavor.
Granulated Sugar
Use ½ cup granulated sugar.
It balances the vinegar and helps the sauce become glossy during baking.
Ketchup
A quarter cup of ketchup adds sweetness, tomato flavor, and color.
Apple Cider Vinegar
Use ½ cup apple cider vinegar.
This gives the sauce its pronounced tang. The finished dish has a clear sweet-and-sour balance rather than a mild, mostly sweet glaze.
Soy Sauce
Two tablespoons of soy sauce add savory depth. Low-sodium soy sauce is a useful option if you prefer more control over saltiness.
Garlic Powder and Salt
Use 1 teaspoon garlic powder and ½ teaspoon sea salt in the sauce.
Season the chicken lightly with additional salt and black pepper if desired, remembering that the sauce also contains soy sauce.
How to Make Baked Sweet and Sour Chicken
1. Prepare the Oven and Pan
Preheat the oven to 325°F (165°C).
Lightly grease a 9×13-inch baking dish, or line a suitable baking pan with parchment paper.
2. Prepare the Chicken
Pat the chicken pieces dry and season lightly with salt and pepper if desired.
Keep the pieces similar in size so they cook evenly.
3. Coat with Cornstarch
Place the cornstarch and chicken in a large food-safe zip-top bag. Seal and shake until coated.
Remove the chicken, shaking off loose cornstarch.
4. Dip and Brown
Beat the eggs in a shallow bowl.
Heat some of the oil in a large skillet over medium-high heat. Dip the chicken pieces in egg, let excess drip off, and place carefully in the skillet.
Brown in batches, turning to color the coating on several sides. The chicken does not need to cook through at this stage.
Transfer each batch directly to the prepared baking dish. Add the remaining oil as needed, and avoid crowding the skillet.
5. Mix the Sauce
Whisk together the sugar, ketchup, apple cider vinegar, soy sauce, garlic powder, and sea salt.
Stir until well combined.
6. Bake
Pour the sauce evenly over the chicken and turn gently to coat.
Bake uncovered for approximately 1 hour, gently turning the pieces halfway through.
Begin checking earlier if your chicken pieces are small. The chicken should reach 165°F (74°C) in the center, and the sauce should be bubbling and coating the pieces. Remove once cooked and glazed rather than continuing solely to meet the timer.
7. Rest and Serve
Let stand for about 5 minutes.
Spoon the chicken and sauce over rice and serve warm.
Tips for the Best Results
Use a Consistent Amount of Chicken
Breast sizes vary, so weighing the chicken helps keep the sauce-to-meat ratio balanced.
Shake Off Loose Cornstarch
A thin, even coating works better than thick powdery patches.
Brown in Small Batches
Crowding cools the skillet and encourages steaming. Give the pieces room to develop color.
Move Straight from Skillet to Oven
Prepare the sauce and baking dish before browning so the partially cooked chicken can continue cooking immediately.
Turn Gently
Use a broad spatula to turn the chicken during baking without scraping off the coating.
Watch the Sauce Near the End
The glaze can darken as its moisture evaporates. If it becomes too thick before the chicken is ready, add a small splash of water.
Expect a Sticky Coating
The browned crust softens as it absorbs sauce. This dish has a glazed finish rather than a dry, crunchy exterior.
Easy Variations
Chicken Thighs
Use an equal weight of boneless, skinless chicken thighs. Cut evenly and check doneness with a thermometer.
Spicy Sweet and Sour Chicken
Add a little hot sauce or crushed red pepper flakes to the sauce.
Bell Pepper Addition
Add bite-sized bell pepper pieces to the baking dish. They release moisture, so the sauce may need a little longer to reduce.
Pineapple Addition
Fold in well-drained pineapple chunks during the second half of baking. This adds fruit flavor and sweetness.
Rice Bowl Serving
Serve over rice with steamed broccoli, shredded carrots, and sliced green onions.
What to Serve with Sweet and Sour Chicken
Plain rice is ideal for catching the extra sauce. Jasmine rice, brown rice, or cauliflower rice all work.
For vegetables, choose steamed broccoli, green beans, snap peas, or a crisp cabbage salad. Keep the sides simply seasoned so the sauce remains the main flavor.
Make-Ahead Tips
Whisk the sauce ahead and refrigerate in a covered container. Cut the chicken in advance and refrigerate separately.
Coat and brown the chicken shortly before baking. Do not partially cook it and store it to finish another day.
For meal prep, cook the dish completely, then portion with rice and vegetables.
Storage and Reheating
Refrigerate leftovers promptly in airtight containers for up to 3–4 days.
Reheat gently in the microwave or in a covered baking dish at 325°F (165°C) until hot throughout. Add a splash of water if the sauce has thickened considerably.
Freeze cooled portions for up to 2 months for best quality. Thaw in the refrigerator before reheating. The coating will soften after storage.
Frequently Asked Questions
Do I need to cook the chicken fully in the skillet?
No. The skillet step browns the coating. Transfer directly to the baking dish and finish cooking in the oven.
Can I skip the skillet step?
The recipe is designed around browning the coating before baking. Skipping that step changes the texture and can leave an uneven egg coating.
Why does the chicken go into cornstarch before egg?
The cornstarch adheres to the chicken, and the egg creates an outer layer that browns in the skillet. Follow that order for this version.
Can I use white vinegar?
White vinegar of the same acidity can work, but it gives a sharper, less fruity flavor than apple cider vinegar.
Why is my sauce thin?
The chicken may have released extra moisture, or the pan may be crowded. Bake uncovered and allow time for reduction while checking that the chicken does not overcook.
Can I double the recipe?
Yes. Use two baking dishes so the chicken is not piled deeply. Browning and baking may take longer when working in larger batches.