
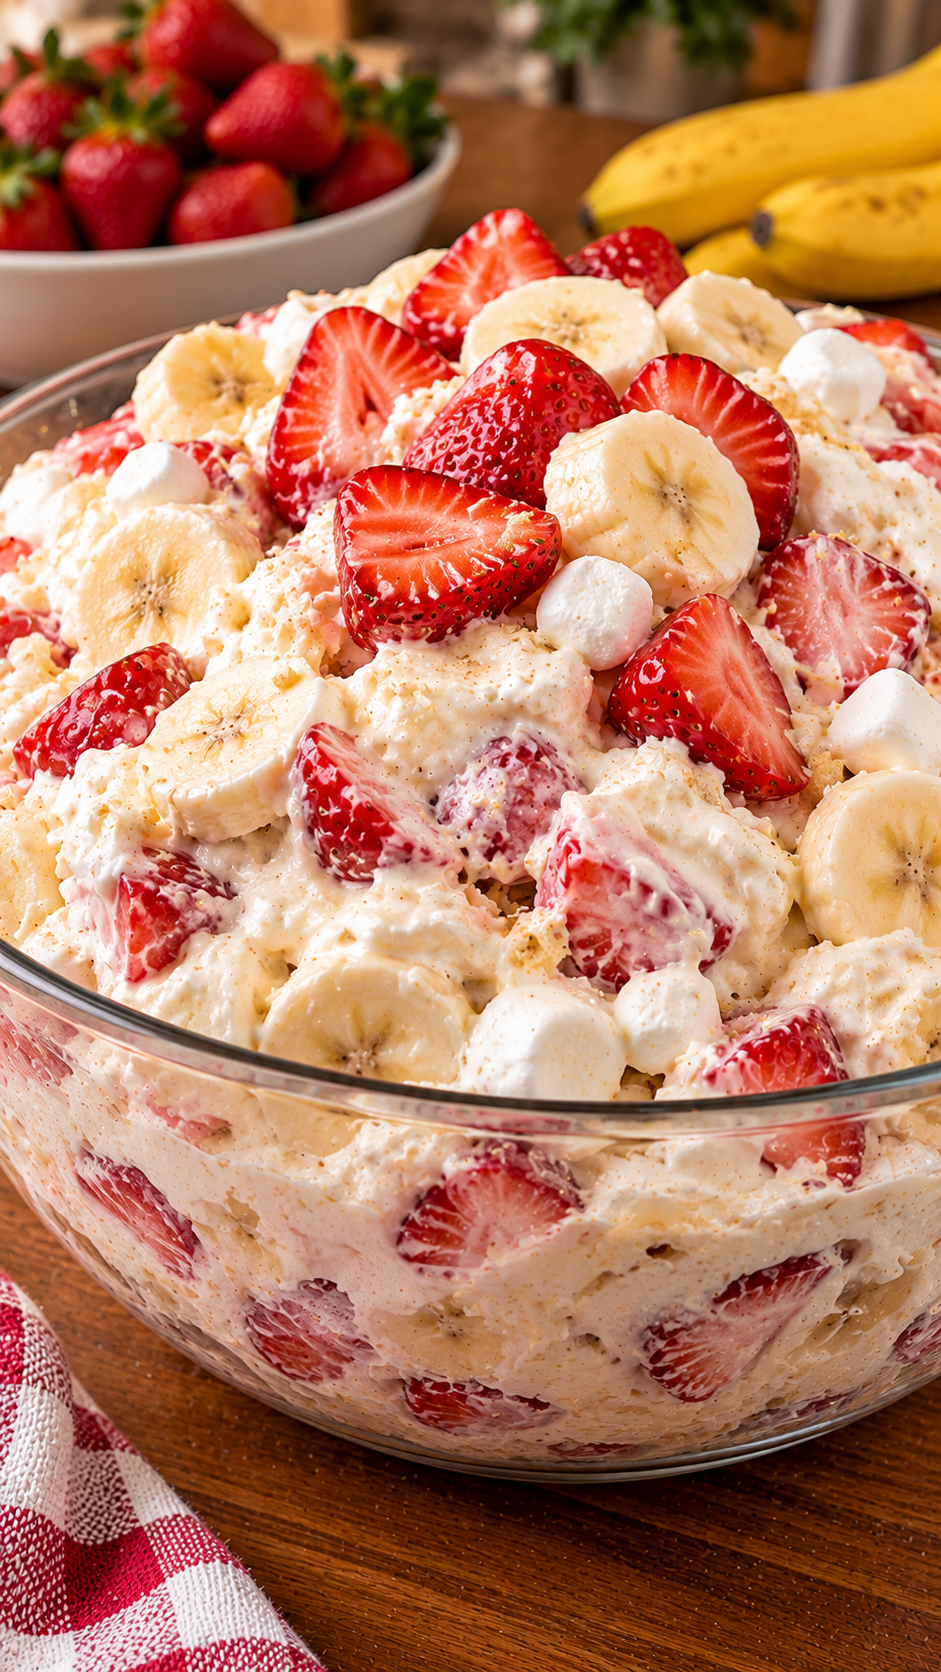
Servings: 8 to 10
If you are looking for a dessert that feels light, refreshing, and completely irresistible, this Strawberry Banana Cheesecake Salad is exactly what you need. It is a creamy, fluffy, no-bake delight that combines the rich flavor of cheesecake with fresh fruit and pillowy marshmallows. It comes together in just a few minutes and is the perfect make-ahead dish for potlucks, summer barbecues, holiday dinners, or a simple weekend treat.
Despite the name, this is less of a traditional salad and more of a decadent dessert dip or fruit fluff. The base is a velvety blend of cheesecake filling, vanilla yogurt, and cheesecake pudding, folded together with whipped topping. Fresh strawberries and bananas are gently stirred in, adding a bright, juicy burst of flavor in every bite.
Why This Recipe Works
This recipe layers multiple cheesecake flavors to create a dessert that tastes rich and complex but takes very little effort. The ready-to-eat cheesecake filling provides a dense, creamy base, while the cheesecake pudding mix adds structure and intense flavor. The yogurt and Cool Whip lighten the mixture, giving it that classic “fluff” texture. The key is folding the ingredients gently rather than stirring vigorously, which keeps the mixture airy and prevents the fruit from getting crushed.
Ingredients
- 1/2 package Philadelphia ready-to-eat cheesecake filling
- 2 small containers vanilla yogurt
- 1 tub (8 oz) Cool Whip, thawed
- 1 small package cheesecake-flavored instant pudding mix
- 1/2 bag miniature marshmallows (optional)
- 1 container fresh strawberries, washed and sliced
- 4 ripe bananas, sliced
Instructions
- Prepare the pudding: Prepare the cheesecake instant pudding according to the package instructions. Refrigerate until cooled and thickened.
- Make the cheesecake filling: In a large mixing bowl, combine the Philadelphia cheesecake filling, vanilla yogurt, and prepared cheesecake pudding. Stir until smooth and creamy.
- Add the whipped topping: Gently fold in the thawed Cool Whip until the mixture becomes light, fluffy, and evenly combined.
- Add marshmallows: Stir in the miniature marshmallows, if using, for extra sweetness and a soft, chewy texture.
- Prepare the fruit: Wash, dry, and slice the strawberries. Peel and slice the bananas into bite-sized rounds.
- Combine everything: Gently fold the sliced strawberries into the cheesecake mixture. Add the banana slices shortly before serving to help prevent browning.
- Chill: Cover the bowl and refrigerate for about 30 minutes to allow the mixture to become cold and creamy.
- Garnish and serve: Just before serving, garnish with a few extra fresh strawberry slices or a sprinkle of graham cracker crumbs if desired. Serve chilled.
Tips for the Best Results
Keep the bananas fresh. Bananas brown quickly once sliced. If you need to make this salad a few hours in advance, toss the banana slices in a little lemon juice before adding them, or simply wait to slice and fold them in right before you serve.
Dry the strawberries. After washing the strawberries, pat them dry with paper towels. Excess water will dilute the creamy cheesecake mixture and make the salad runny.
Fold, don’t stir. Use a spatula to gently fold the Cool Whip and the fruit into the base mixture. Overmixing deflates the fluff and can make the fruit mushy.
Use room-temperature cream cheese filling. If your cheesecake filling has been in the fridge, let it sit on the counter for 15 to 20 minutes so it blends smoothly with the yogurt and pudding.
Storage and Serving
Store any leftovers in an airtight container in the refrigerator for up to 2 days. The bananas will start to brown and the marshmallows may soften over time, so this salad is best enjoyed within 24 hours of making it. Serve it as a sweet side dish at a barbecue, as a dessert at a holiday meal, or simply in small bowls for a refreshing afternoon snack.
Creamy, fruity, and delightfully sweet, this Strawberry Banana Cheesecake Salad is a guaranteed crowd-pleaser that requires zero oven time and barely any prep work.